donderdag 15 augustus 2019

The Amelia Bomber Jacket


De Amelia: een echt bomber jacket, inclusief voering ...  Het staat al een hele tijd op mijn "to sew" lijstje.
Alleen wordt dat lijstje steeds maar langer, dus het kwam er maar niet van.  
De stof lag te blinken in de kast, de "goesting" was er maar er kwam steeds iets tussen.
Een patroon testen, inclusief deadline, is dus ideaal om te starten met die projectjes die alleen maar schijnen op te schuiven op dat lijstje (naar beneden welteverstaan).

The Amelia: A real bomber jacket, including lining ...
It seems to be on my "to sew" list for ages.
Only that list keeps getting longer, so it just didn't happen.
The material was shining in the closet, the "desire" was there but something always came up.
Testing a pattern, including a deadline, is therefore ideal to start with those projects that only seem to be moving down on that list.


Ik ontdekte dat het naaien van een bomber met voering niet echt een beginnersprojectje is.  Je moet er echt wel je hoofd bij houden.  Vooral de kraag vroeg wat denkwerk.  Gelukkig zorgde de goede instructies van Warderobe by me dat ik me er goed doorheen kon worstelen.

I discovered that sewing a bomber jacket with lining is not really a beginner's project. You really have to keep your head on it. The collar in particular required some thought. Fortunately, the good instructions from Warderobe by me allowed me to struggle through it.


De Amelia is een patroon geschikt voor niet rekkende stoffen of stoffen met weinig rek zoals katoen, linnen, French Terry, ...
Je stofkeuze bepaald of je een sportieve of een meer geklede versie krijgt.
Ik gebruikte een niet rekbare velours die ik kocht bij naaimachines Stael in Torhout.  Als voering gebruikte ik Venezia.  
Het resultaat is een heerlijk zacht vestje geschikt voor het tussenseizoen.  
De maten zijn nu ook uitgebreid van maat 30 tot maat 54
Ik ben alvast fan van het patroon!

The Amelia is a pattern suitable for non-stretching fabrics or fabrics with little stretch such as cotton, linen, French Terry, ...
Your fabric choice determines whether you get a sporty or a more dressed version.
I used a non-stretchable velor that I bought at Stael sewing machines in Torhout. I used Venezia as a liner. The result is a wonderfully soft bomber, suitable for the mid-season.
 The sizes are now also expanded from size 0 to size 24.
 I'm already a huge fan of the pattern!

woensdag 14 augustus 2019

The oh so beautiful Oia dress

Ik hou enorm van jurken, zeker van speciale jurken die iets extra hebben.  Een detail dat hen net dat beetje anders maakt dan al die andere jurken ...
De nieuwe Oia dress van Itch to Stitch heeft dat zeker!

 I really love dresses, especially special dresses that have something extra. A detail that makes them that little bit different than all those other dresses ...
The new Oia dress from Itch to Stitch certainly has that!


Ik vind de jurk enorm elegant met het speciale voorpand gevormd door de brede schouderbanden, de zijpanelen en het v-vormige middendeel.
De rivetten en de veter zorgen dan weer voor een speelsere toets.

 I find the dress extremely elegant with the special front formed by the wide shoulder straps, the side panels and the V-shaped middle section.
The grommets and the lace-up neckline provide the more playful touch.


De aanbevolen stof voor de Oia dress is een stevige, niet rekbare stof.
Voor deze jurk gebruikte ik stretchkatoen uit mijn stoffenvoorraad, een lang gekoesterde schat.

The recommended fabric for the Oia dress is a structured woven fabric.  For this dress I used stretch cotton from my fabric stock, a long cherished treasure.


 The Oia dress is een A-lijn jurk die flatterend is voor elk figuur.  Er zijn opties voor de cupmaten A, B, C, D en DD, een "bust adjustment" is dus niet nodig.
Ook de zakken zijn een leuke optie.
Ik vind de jurk alvast een aanwinst voor mijn "jurkencollectie" 💓.

The Oia dress is an A-line dress that is flattering for every figure. There are options for cup sizes A, B, C, D and DD, so a bust adjustment is not necessary.
The pockets are also a nice option.
I think the dress is an asset to my "dress collection" 💓.

maandag 12 augustus 2019

How to draw and sew a perfect V-neck on any pattern

Ik laat u graag zien hoe je een V-nek tekent en naait bij de Autumn spice top
van Ellie and Mac. Natuurlijk kan je dezelfde techniek toepassen op elk patroon. 

I would like to show you how to draw and sew a V-neck on the Autumn spice top
from Ellie and Mac. Of course you can apply the same technique to every pattern.


 De Autumn spice top is het ideale color block patroon om restjes en paneeltjes mee te verwerken.   Je kan variëren met de hoogte van je color block gedeelte, er is een optie om het boven de buste te laten starten en ook één om het onder de buste te laten starten.  
De moderne gebogen zoom zorgt voor een mooie afwerking.

The Autumn spice top is the ideal color block pattern to use with your scraps and panels. This pattern has both above the bust and below the bust options for the top color block section and sleeve sections.  It has a trendy curved hemline and you are going to love the relaxed fit!


 Het originele patroon heeft een mooie ronde neklijn.  Hoe leuk ik die ook vind, ik blijf een fan van de v-nek voor mijn brede schouders.  Ik besloot dan ook het patroon aan te passen.
Ik vertel je graag hoe ik dat doe in onderstaande tutorial.

The original pattern has a beautiful round neckline. As much as I like it, I remain a fan of the v-neck for my broad shoulders. I therefore decided to adjust the pattern.
I would love to tell you how I did that.

Eerst moeten we de patroondelen van het voorpand en de nekband aanpassen.

First we have to alter the front pattern piece and the neckband pattern piece.

Neem je patroondeel van het voorpand.  Bepaal hoe diep je je v-nek wilt hebben. 
Teken een licht gebogen lijn van dit punt naar de originele neklijn.  Een gebogen lijn geeft een mooier eindresultaat dan een rechte halslijn.


Take your pattern piece of the front.  Determine how deep you want your V-neck to come.
Draw a curved line from that point to the original neckline.  A curved line gives you a more beautiful neckline than a straight one.


Knip je patroondeel uit op de halslijn die je net getekend hebt.

Cut your pattern piece on the line you just have drawn.


Als je je aangepaste patroondeel uit je stof knipt ziet het er zo uit.
            
If you cut your adjusted pattern piece out of your fabric it looks like this.
Vervolgens passen we de nekband aan.
Neem de patroondelen van het voor- en achterpand en teken een lijn op de naadwaarde aan de schouders.
Meet de halslijn van het voorpand en van het achterpand (zonder de naadwaarde) en tel deze twee waarden op.  Neem 90% van dit getal.  Dit is de totale lengte van je nekband.  Deel dit getal in 2 (je knipt immers op de stofvouw) en vergeet niet om langs 1 zijde de naadwaarde bij te rekenen.  Teken je nieuwe patroondeel volgens deze afmetingen.  De originele breedte blijft dezelfde.

Now we are going to adjust the neckband.
Take the patternpieces from the front and the back and draw a line on the seam allowance of the shoulders.  Measure the neckline on the front and the back (without the seam allowance) and count these two numbers together. Take 90% of this number. This is the total length of your neckband. Divide this number in 2 (after all, you cut on the fabric fold) and do not forget to add the seam allowance along 1 side.  Draw your new pattern part according to these dimensions. The original width remains the same.


Neem het patroondeel van de nekband en vouw het over de lange zijde doormidden.

Take the pattern piece of the neckband and fold it in half lengthwise.
Leg het tegen het patroondeel van de nekband tegen het voorpand zodat de onderhoek van de nekband tegen de bovenhoek van de neklijn van het voorpand komt.  Teken hier een lijn op de nekband, loodrecht naar boven.

Place the pattern piece of the neckband against the pattern piece of the front so that the bottom corner of the neckband comes up against the top corner of the neckline of the front. Draw a line on the neckband, straight to the top.


 Knip de het patroondeel van de nekband uit op deze lijn.  Je patroondeel ziet er dan zo uit.
Knip het 1 x tegen de stofvouw.

Cut the pattern piece of the neckband on this line. Your pattern piece will look like this.
Cut 1 against the fabric fold.

Naai de v aan je nekband op de naadwaarde.  Knip in het puntje van de v tot tegen het stiksel.

Sew the v on your neckband on the seam allowance. Cut in the tip of the v up to the stitching.
Vouw je nekband in de helft, met de punten op elkaar.  Dit zou er zo moeten uitzien.

Fold your neckband in half, with the points on top of each other. This should look like this.


Volg nu de originele handleideng van het patroon tot aan het hoofdstuk waarin de nekband wordt bevestigd. 

Now follow the original manual of the pattern up to the part were the neckband is attached.

Naai een verstevigend stiksel in de v op de naadwaarde van het voorpand.

Staystitch the v on the seam allowance of the front.
Knip de v in tot tegen de naadwaarde.

Cut in the tip of the v up to the stitching.
Naai de nekband aan het voorpand.  Je kan hierbij de ingeknipte V van het voorpand spreiden zoals op de foto.  Zorg er wel voor dat het puntje van de v mooi gelijk ligt met de naad op de punt van de nekband.
Ik vind het makkelijker om eerst een stukje links en rechts van de punt te naaien alvorens ik de rest van de nekband speld.  De spanning is dan iets minder en dat naait fijner.

Sew the neckband to the front. You can spread the cuted V of the front piece as in the photo. Make sure that the tip of the V is nicely alligned with the seam on the tip of the neck band.  I find it easier to sew a bit to the left and right of the point before I pin the rest of the neckband. The tension is then slightly less and that sews easier.

Zo ziet je prachtige V er langs de voorzijde uit 💖.  Bevestig nu de rest van je nekband en werk je T-shirt af zoals vermeld in de handleiding.

This is how your beautiful V looks from the front 💖. Now attach the rest of your neckband and finish your T-shirt as stated in the instructions.
Ik hoop dat je iets had aan deze tutorial.  
Het ziet er allemaal moeilijker uit dan het eigenlijk is, en zoals bij alles: oefening baart kunst 😉.
Veel succes!

 I hope you enjoyed this tutorial.
It all looks harder than it actually is, and like everything else: practice makes perfect 😉.
Good luck!

donderdag 8 augustus 2019

The Ziggy Zipper Hoodie

Tieners en hoodies, het zijn 2 handen op 1 buik.  Ze kunnen nooit genoeg exemplaren hebben ...
Ik besloot dus voor Kobe een exemplaar van de Ziggy Zipper Hoodie van Warderobe By Me te maken.

 Teenagers and hoodies, they are 2 hands on 1 belly. They can never have enough of them ...
So I decided to make a Ziggy Zipper Hoodie from Warderobe By Me for Kobe.


Kobe is lang en smal.  Qua lengte valt hij in de mannenmaten, maar qua breedte valt hij nog in de kindermaten.  Hierdoor is het niet makkelijk om geschikte patronen voor hem te vinden.
De patronen van Warderobe By Me zijn hiervoor echt ideaal. 
De maten beginnen bij 2XS (lengte 1m60 en borstomtrek 74cm) en gaan tot 3XL (lengte 1m85 en borstomtrek 116cm).

Kobe is long and narrow. In terms of height, he falls in the men's sizes, but in terms of width, he still falls in the children's sizes. This makes it difficult to find suitable patterns for him.
The patterns of Warderobe By Me are really ideal for this.
The sizes start with 2XS (length 1m60 and chest circumference 74cm) and go up to 3XL (length 1m85 and chest circumference 116cm).


De Ziggy is een tijdloze hoodie met een rits vooraan.
Je kan kangoeroezakken toevoegen op het voorpand en er is een optie op de hoodie zonder mouwen te maken.  De mouwboorden en de heupband zijn gemaakt van boordstof.

The Ziggy is a timeless hoodie with a zipper in the front.
You can add kangaroo pockets on the front and there is an option to make a sleeveless hoodie. 
The cuffs and the waistband are made of ribbed knit fabric.

 Kobe is alvast enthousiast over de Ziggy Zipper hoodie die ik maakte van jeans French Terry.  Natuurlijk kan je ook een andere stofsoort gebruiken.  Sweaterstof of tricot zijn ook goede keuzes.
Ik ben benieuwd naar jullie exemplaren ...

Kobe is already enthusiastic about the Ziggy Zipper hoodie that I made from French Terry jeans. Of course you can also use a different fabric type. Sweater fabric or jersey are also good choices.
I am curious about your versions...

vrijdag 19 juli 2019

A really unique dress

Akinori ... 
het eerste patroon dat ooit verscheen bij Warderobe By Me.  Ondertussen is dit al 4 jaar geleden en ik moet tot mijn grote schaamte bekennen dat ik het nog nooit genaaid heb.  Tot nu ...

Akinori ...
the first pattern that Warderobe By Me released.  This is 4 years ago and I must confess to my magnitude that I have never sewn it. Until now ...


De Akinori heeft een perfecte pasvorm!  Het is een comfortabele jurk met een wikkeltop en een vast rokgedeelte.  De prachtige tailleband en de riem zetten de taille extra in de verf. 
Ik nam de proef op de som en de jurk blijft mooi aansluiten als je voorover buigt.
Het prachtige aan de Akinore is dat de jurk de dingen die we graag in het oog laten springen accentueert en de zone's die we liever wat verdoezelen, camoufleert.

 The Akinori has a perfect fit! It is a comfortable dress with a wrap top and a fixed skirt. The beautiful waistband and the belt emphasize the waist.
I put it to the test and the dress keeps on fitting when you bend over.
The beauty of the Akinore is that the dress accentuates the parts that we would like to catch the eye and camouflages the zones that we prefer to obscure.


De elegante Akinore is ontworpen voor lichtgewicht, niet rekkende stoffen, maar kan ook gemaakt worden in tricot.

The Akinore dress is designed for lightweight woven fabric but works equally well in jersey fabric.  


Ik maakte mijn jurk in een prachtig, soepel stofje van Les Lisettes. Het is perfect voor deze jurk!

I made my dress in a beautiful, flowy fabric from Les Lisettes. It is perfect for this dress!

woensdag 17 juli 2019

The beautiful new Litore dress

Waarschijnlijk kennen jullie de Litore voor meisjes al.  
De jurk met het prachtige rugdetail van Sofilantjes.  
Deze kinderversie kreeg nu ook grote meisjesversie: De Litore jurk en tuniek voor dames.

You probably already know the Litore for girls.
The dress with the beautiful back detail from
Sofilantjes.
This children's version now also had a big girl's version:
The Litore dress and tunic for ladies. 


 Ik maakte niet één, niet twee, maar maarliefst drie versies van deze jurk.  
De mogelijkheden zijn immers erg uitgebreid. 
Voor het lijfje kan je kiezen tussen de normale taille of de empire taille.  
Als rok voorziet het patroon een hoog-laag cirkelrok of een rechte rok in drie lengtes.
Voor de eerste keer in mijn naaicarrière maakte ik een maxirok.  Ik stond er wat sceptisch tegenover, maar ik moet toegeven:  ik ben verkocht.

I didn't make one, not two, but no fewer than three versions of this dress.
After all, the options are very extensive.
For the body you can choose between the normal waist or the empire waist.
As a skirt, the pattern provides a high-low circle skirt or a straight skirt in three lengths.
For the first time in my sewing career I made a maxi skirt. 
I was a bit skeptical, but I have to admit: I am sold to this one.


Na mijn 2 maxi versies maakte ik ook nog een knielange Litore jurk.  De rok is normaal iets korter, maar ik heb deze met 2,5 cm verlengd.   

After my 2 maxi versions, I also made a knee-length Litore dress. The skirt is normally a bit shorter, but I have lengthened it by 1 inch.


 Het zwarte viscose tricot stofje van mijn eerste Litore jurk is afkomstig van de Soldeur in Kortrijk.
Het crèmekleurige bloemenstofje van mijn tweede jurk is eveneens een viscose tricot, deze kocht ik bij Creasis in Ronse.
De derde stof is een katoen tricot van Meghan Blue, aangekocht bij de Stoffenstraat in Kasterlee. 

The black viscose jersey fabric of my first Litore dress comes from the Soldeur in Kortrijk.
The cream-colored flower fabric from my second dress is also a viscose jersey, I bought it at Creasis in Ronse.
The third fabric is a cotton jersey from Meghan Blue, purchased at the Stoffenstraat in Kasterlee.


De patronen zijn verkrijgbaar in meerdere talen:
The patterns are available in multiple languages:

Wil je graag zowel de meisjesversie als de damesversie kopen?  Dan zijn er voordelige bundels beschikbaar:
Would you like to buy both the girls version and the ladies version? Bundles are available:

woensdag 10 juli 2019

Two beautiful Ellie and Mac patterns

 Ik maakte deze keer niet één maar twee patroontjes van Ellie and Mac: 

This time I made 2 patterns from Ellie and Mac: 


 De Around the block hoodie is een super eenvoudig color block patroon, dat zeker ook doenbaar is voor beginnende naaisters.  
Elk patroondeel (het voorpand, het rugpand en de mouwen) bestaat uit drie delen die je dan samen naait tot één geheel.  Vervolgens naai je de trui in elkaar zoals elke trui.
De zakken van de Around the block hoodie zitten in de zijnaad, lekker makkelijk dus. 
De gekruiste kap en de koordjes zorgen voor een leuk detail.

 The Around the block hoodie is a super simple color block pattern, which is certainly suitable for a novice seamstress.
Each pattern piece (the front, back and sleeves) consists out of three parts that you sew together into one pattern piece. Then you sew the hoodie together like you normally do.
The pockets of the Around the block hoodie are in the side seam, so they are easy to sew.
The wrap around hood with cord detail is the perfect finishing touch!


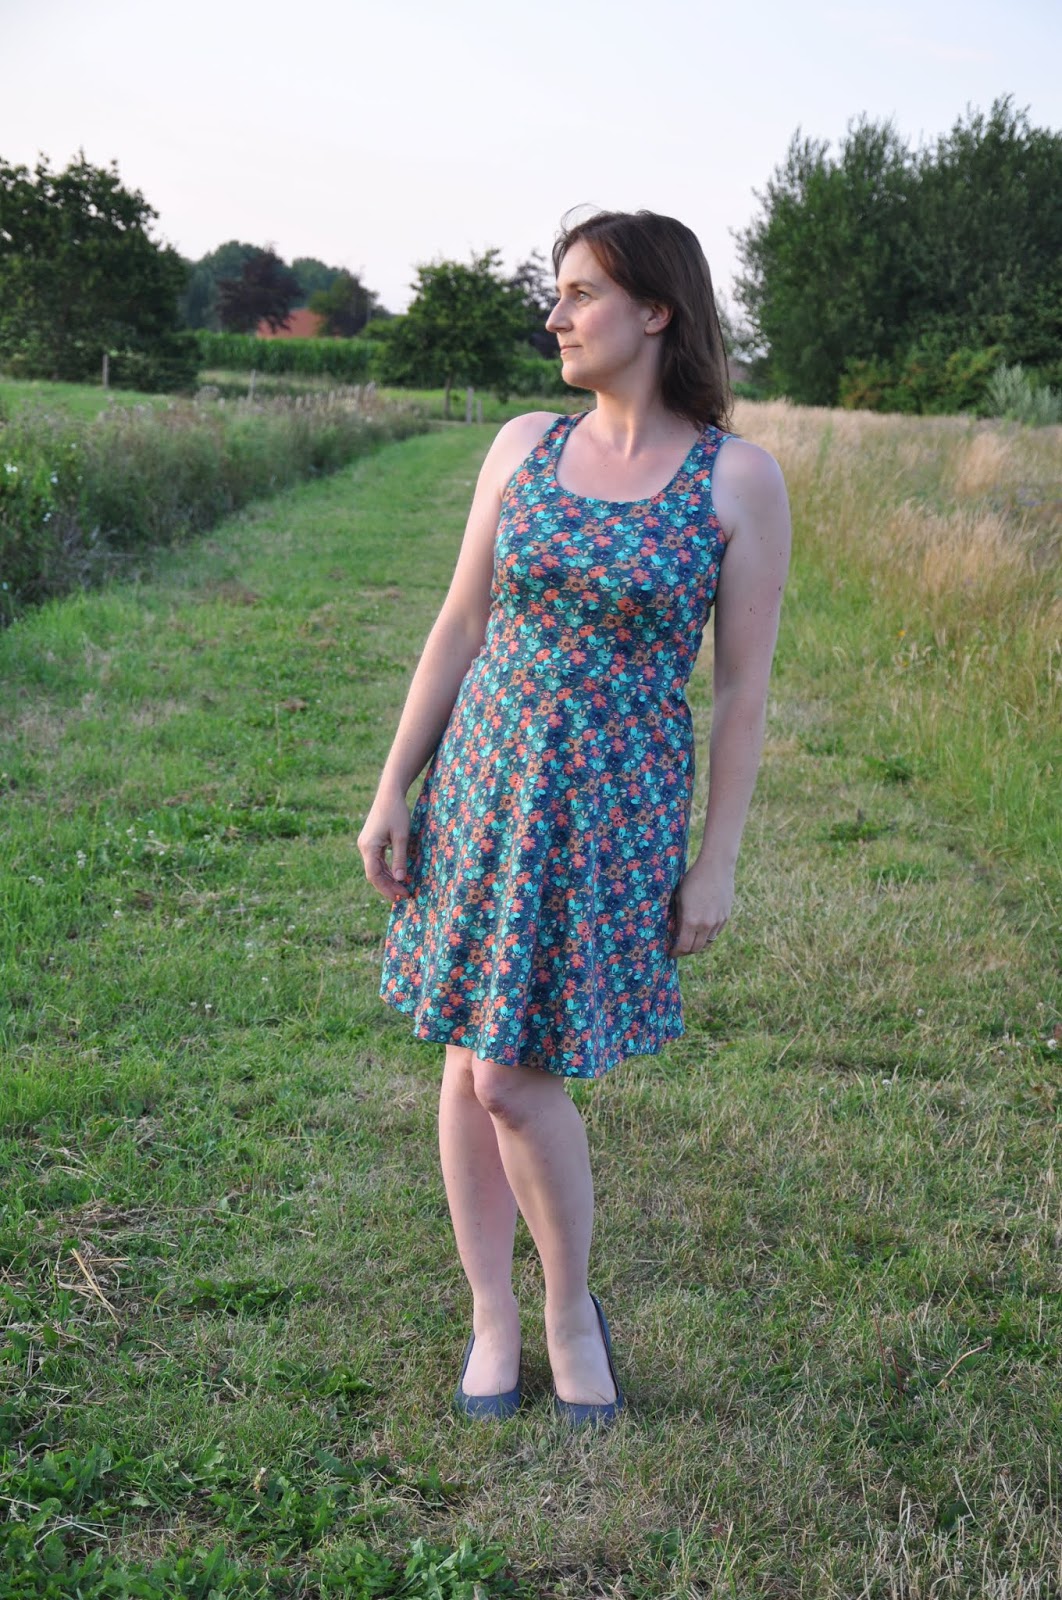
 De Tulip dress  droeg ik ondertussen al enkele keren en telkens kreeg ik complimentjes.  Het is een op zich erg eenvoudige jurk, maar de vorm van de zoom maakt de jurk toch weer erg special.  Een echte aanrader want de jurk steekt in een mum van tijd in elkaar.

  I already wore the Tulip dress a few times and every time I received compliments. It is a very simple dress in itself, but the tulip shape of the hem makes the dress more special. Highly recommended because the dress comes together in no time.